When I started developing Plasmoid(widget) for the first time for the KDE Plasma desktop, I was excited by the possibilities but found the process itself to be fragmented. The documentation was scattered, and I had to piece together a workflow from various sources just to handle basic tasks like project setup, packaging, and previewing changes.
The constant need to manually restart plasmaviewer just to see a small UI tweak was particularly tedious. This experience made it clear that a dedicated, all in one tool was needed to streamline the entire development lifecycle.
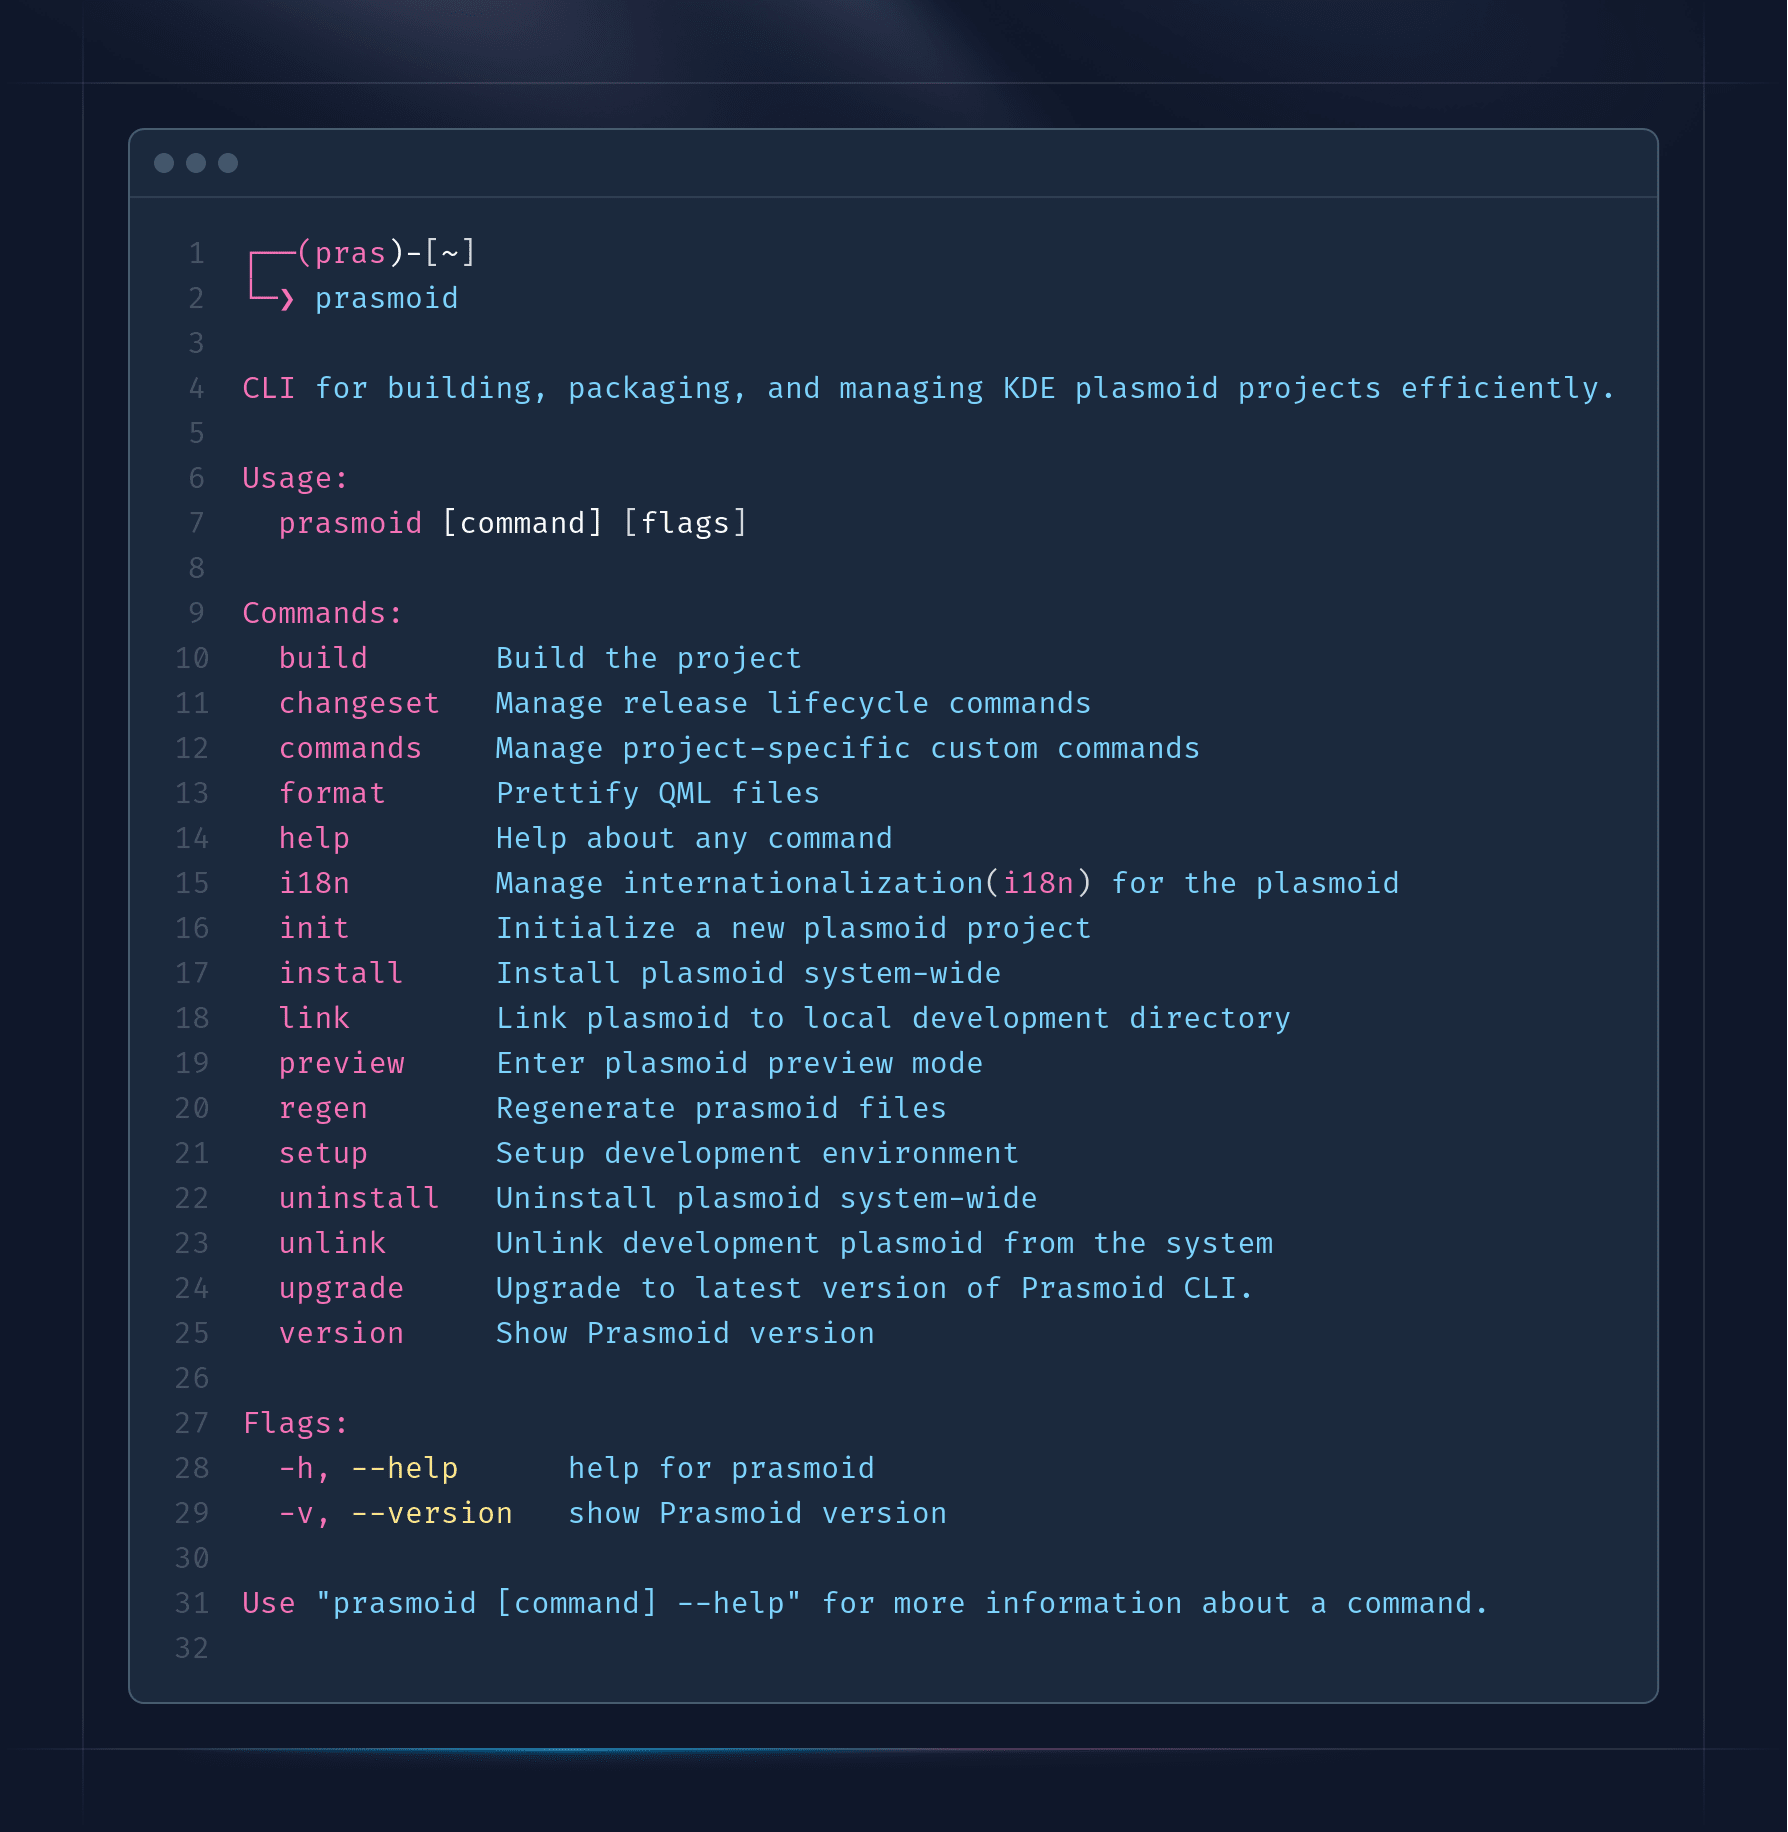
I built Prasmoid to be that tool. It's a command line interface, written in Go, designed to handle all the boilerplate and repetitive tasks, allowing a developer to focus on the creative work of building the plasmoid itself. It automates everything from project initialization to the final build, providing a smooth and efficient workflow.
A Seamless Workflow from Start to Finish
Let's walk through how Prasmoid transforms the development experience.
Kickstart your project with a single command.
prasmoid initPrasmoid's interactive wizard will ask for your project's details and generate a complete, ready to code structure.
See your changes live. Run the preview command with the watch flag:
prasmoid preview --watchThis opens your plasmoid in plasmaviewer window that automatically restarts whenever you save a file. You can focus purely on writing your QML code.
Ready to share your creation? First, handle translations with ease.
# Extract all translatable strings
prasmoid i18n extract

# Compile translations for use in the plasmoid
prasmoid i18n compile
Then, package your project into a .plasmoid file, ready for installation or uploading to the KDE Store.
prasmoid buildAdding Custom Deployment Scripts
Create a new deployment command by adding a JavaScript file in the .prasmoid/commands/ directory. For example, to create a deploy command:
prasmoid command add -n deployThis will generate a template file at .prasmoid/commands/deploy.js where you can define your deployment logic. Here's an example implementation that builds the project and deploys it to a remote server:
/// <reference path="../../prasmoid.d.ts" />
const prasmoid = require("prasmoid");
const { execSync } = require("child_process");
const path = require("path");

prasmoid.Command({
  run: (ctx) => {
    console.green("Starting custom deployment...");

    // 1. Build the project
    execSync("prasmoid build");
    console.log("Build complete.");

    // 2. Copy to server
    const plasmoidId = prasmoid.getMetadata("Id");
    const version = prasmoid.getMetadata("Version");
    const archive = path.join("build", `${plasmoidId}-${version}.plasmoid`);
    const remote = "user@server:/path/to/plasmoids/";

    console.log(`Copying ${archive} to ${remote}`);
    execSync(`scp ${archive} ${remote}`);

    console.green("Deployment finished!");
  },
  short: "Builds and deploys the plasmoid.",
});
To execute your deployment command, simply run:
prasmoid deployBuilt for the Community
Prasmoid was born from a personal need, but it has grown with the help of the KDE community. A special thanks to contributors like clorteau for packaging Prasmoid for Arch, Debian, and Fedora, making it accessible to a wider audience.
Features like comprehensive i18n support have been added based directly on community feedback. This project is a testament to the collaborative spirit of open source, and contributions are always welcome, whether it's code, documentation, or new ideas.
The Road Ahead
The journey for Prasmoid is just beginning. The goal is to make it the undisputed standard for modern Plasmoid development. Here are some of the ideas on the roadmap:
- Advanced Scaffolding: Introducing templates for different types of plasmoids, so you can start with more than just a basic structure.
- Richer JavaScript API:
Expanding the
prasmoidmodule available in custom commands to allow for even deeper integration with the build process. - Automated Publishing: Adding commands to help automate the process of publishing your plasmoid to the KDE Store.